Showing posts with label repurposing. Show all posts

Tuesday, November 6, 2012

Time to Set a Stage . . .


Here it is – the first show YOU are helping to put on!  You may be a teacher, part of a troupe, or just hosting an event for the first time.  And, just as you may fret over what costume you should wear, you are probably fretting over what costume your STAGE should wear!  After all, it may not be a “stage” at all.  If it is, you are lucky, because it has lighting (of some sort) and a back drop.

If it is not, you may be staring at a cinderblock wall and a gymnasium floor.

So, how to dress it up?

Regarding the gym floor, please resist the temptation to put down rugs, veils, etc.  Your dancers WILL slip.  It is dangerous.  Draw the eye up instead with a backdrop.  We’ll talk a little more about floor options later.

So, how do I make a backdrop?


  •         EASY WAY: Drape veils behind the dancers, using whatever ledge, window, or trim you can.  Use pretty, but not valuable veils.  Secure with thumbtacks.
o   Pros: Fast, simple, reusable, no storage needed
o   Cons: veil damage, wall damage (Do check with your venue to ensure thumbtacks are OK!), sudden veil failure behind someone’s otherwise perfect performance . . .


  • SLIGHTLY HARDER, BUT NOT IMPOSSIBLE: Use a portable clothing rack and your speakers.  Place the rack in between the speakers.  Drape pretty fabric over them to cover.  Use LOTS of safety pins to secure it in place. IF your fabric is NOT flammable, drape some Christmas lights behind for sparkle. 

o   Pros: Good for venues that do not allow thumbtacks.  Good if you have vending in the day, hafla at night.  (You were using that clothes rack to vend anyway, right?!?)
o   Cons: LOTS of safety pins, like 5 per yard.  LOTS of fabric.  Some storage needed.  And, time to assemble and disassemble.

  •         REQUIRES PLANNING AHEAD AND COMMITMENT TO A VENUE: Removable, reusable backdrop based on your location.  When I was in a troupe, we held several events at the church I attended, which, while it had a good space, also had windows that distracted behind the dancers.  Cars’ lights would shine in, the sun would muck with the camera’s focus, etc.  So, I measured the windows (which conveniently had a ledge over the wall between the windows) and use some skills learned by ripping apart custom window treatments to make matching skirts for me and a friend [yes, we called them the Scarlet O’Hara skirts!) to make a very simple swag and drape backdrop. The vertical panels were wrapped over boards, which lay on the ledge.  A staple gun secured the fabric to the board.  (BTW, you should be thinking, “So THAT is what I do with those ten yards of [whatever] I bought [whenever] and didn’t make a costume from it!” Use that fabric for backdrops!)  Then, I used about 1.5 the length of the verticals to drape fabric in between as a swag, again stapling the ends.
o   Pros: Planning around your venue allows you to “solve” problems with it.  But, you have to both plan well and have the skills to build what you need.
o   Cons: Storage of backdrop between shows.  And, what if you never use that venue again???

  •          PIPE AND DRAPE: The classic pipe and drape (best how-to I could find is here: http://www.smittenby.net/2012/04/06/1832/) is a theatrical staple.  You can build the frame and then reuse it time and again with different backdrop fabrics.
o   Pros: looks great, converts any space.
o   Cons: Requires measuring, cutting, thinking about parts.  And storage.  For the committed event producer or the completely insane (like me).

Now that you have a backdrop (and, stick with neutral colors, as too dark or too busy will drown out the dancer), you need to light the stage.  There are how-to’s for making stage lights; but, I found using a portable work light such as http://www.lowes.com/pd_394369-40642-UT-1002_0__?productId=3699586&Ntt=work+light&pl=1&currentURL=%3FNtt%3Dwork%2Blight&facetInfo= worked just fine.  You can even get ones on stands, for which your videographer will thank you.

  •         Pros: Inexpensive, practical, and reusable around the house.
  •      Cons: Any stage light will get HOT.  Keep away from costumes, spins, and children.  Bulbs do not last more than 5-8 hours and shatter when touched.

And, as a videographer, I can say that there is no challenge greater than an undefined dance space.  Dancers will go on safari after the one smile or cute kid in the audience, leaving the video full of the backs of heads and chairs.  How can you solve this?  Define the dance space by laying out some kind of frame – but, make it dancer friendly.  After seeing a few youtube videos with Christmas lights around the stage, I tried that.  A few dancers, including myself, came dangerously close to stepping on  the bulbs.  Plan B: back to Lowes, where I found the 8 foot long clear plastic tubes used to cover florescent bulbs. I got about 4 of them and wrangled them into the cart.  (This may be a good time to go measure your car and find out if you can get them in there, too.)  Then, I went to the plumbing section and got 2 right angle connectors that fit over the tubes (I think they were 2 inch) and one straight connector, same size.  Then, I went to a store that had the white rope lights on sale (I LOVE after Christmas sales) and got enough rope lights to fill the tubes.  Some snaking and cussing later, and I had a nice “frame” for my stage that shouldn’t hurt a dancer if she stepped on it.  Some dancers complained; but, some dancers will ALWAYS complain.  Oh, and I will spare you the lecture on electrical resistance by saying that if you are framing 3 sides of a stage like I did, plan on having the cord of the stage come out both sides, so the non-corded ends meet in the middle.  (This avoids having the lights get dimmer as you look from one side of the stage to the other.

  •          Pros: Relatively easy, looks cool
  •       Cons: Measure your car and the storage space.  Not recommended with stick shifts. ;)

Best of luck with your own events!

Wednesday, April 4, 2012

An Art Teacher Wants Your Scraps

 . .  and your stash of beads and your leftover ribbon and your extra pieces of paper and your spare sequins and . . . well, things you might throw away.

In honor of Earth Day, and because school budgets, particularly ARTS budgets are dwindling due to the recession, I have to write this post.

My daughter's art teacher knows me by name.  We email often.  Why?  Because she takes things that would be my "trash" and turns them into ingredients for treasures her students can make.  I like this arrangement because I hate throwing things away.  I would rather recycle them.  She likes this arrangement because she gets inspiring goodies that her students can use, whether it's the FOUR bags of scraps that came from cleaning my craft room, or the plastic containers that used to hold lunchmeat and can now hold craft supplies.

Costs me nothing but a few minutes.  And, when I see some pieces come home as part of art pieces, it is so worth it!

Don't have a child?  You still have an art teacher, or two.  Call your neighborhood school, daycare, or other institution of learning.

Your trash CAN become someone else's treasure.

All packed up, and ready for an art class!

Sunday, September 11, 2011

"The Practical Manifesto"

In my "day job," I work in software delivery -- which you would think has very little to do with costume design. Except, the wonderful place where I work has allowed me to learn about the Agile method of delivering work -- a methodology that can help one take any major project and deliver it in value - oriented chunks.

What on earth does this have to do with Costume Stuff?

Everything!

Many of us have a love / hate relationship with trying to make our own costumes. We struggle to take big, daunting projects and finish them. Piles of fabric linger as "future costumes" that never get worn and loved. And, attempting projects beyond our skill causes frustration and failure.

Agile shows us that the key to success is to focus on what is really valuable to the customer (in this case, you). By recognizing that, you can make the call on where to invest your time when costuming, and how to break the work down into small, independently useable pieces that you, as the customer of your own work, deem to be the most valuable.

Thus, with apologies to those who crafted the Agile Manifesto, I would like to share my own "Practical Manifesto":

My highest priority is to create beautiful, functional costuming where each piece delivers value to my wardrobe. 


It is perfectly acceptable to shift design in during construction in order to make the costume more useful. 


Costume creations should be constructed in components that can be scaled to the skills and time that I have to work on them and so that I can use them quickly. 


I am both costume designer and costume wearer; I shall never forget that both my creative and practical needs must both be met. 


I need to be motivated to finish a costume; my costume must have a purpose -- an occasion to use it -- in order to make me finish it. 


The most effective way to make the costume beautiful is to try it on frequently in the process of making it. 


Wearable costumes are how I measure my success. 


I need to enjoy the process of creating costumes. In order to enjoy it, I must set reasonable projects that I am confident I can deliver without growing bored or frustrated. 


As I create, I will grow my skills in creation, getting better at costume creation as I practice. (Just as with my dance!) 


The simplest costume pieces are the most versatile and long-lived in my wardrobe. 


My projects should be based on my skills and strengths: I invest time into what I can create and money (for others to make) that which I cannot on my own. It is OK to “outsource” some costume pieces. 


I shall regularly revisit my old creations and see what I would do differently in the future as I create new ones (or, recreate old ones).

I'll discuss some of these concepts in future posts, giving you some ideas on how to make the call on getting the most value out of the time and money you invest in your wardrobe.

Sunday, July 17, 2011

Double Duty

First, apologies from the Practical Dancer. I had lofty, ambitious goals of regular posts that conveyed useful wisdom, all perfectly organized and locked down in files saved to my hard drive, perfectly edited and back up copies ready in case of the catastrophic event of a blog move.

Sigh.

The Practical Dancer has a day job. I have a "second job" of being a Dance Student, Dancer, and troupe member. I am a Wife and a Mom. I read incessantly about dance online. I sew whenever I can, and I have a house to clean, bills to pay, and cats to pet. And, I have some lingering New Year's resolution about "priorities." Like you, I have "a lot on my plate."

It is more important to me that I get these ideas out here for you than that I get them captured permanently on my overstuffed hard drive. Welcome to the new me, fast and loose, and forgive me for being gone for so long.

Now, for the post.

What I have learned in my overstuffed life is that in order to do fun things like go to workshops, the beach, or to visit family for the weekend, you have to spend a fair amount of time traveling. Time one could spend dancing or sewing. I used to just use that time to *think* about dancing or sewing, accomplishing about 2% of good in the process. Then, I learned a simple trick from the Great and Powerful Ozma -- you can, under the right circumstances, multitask! Since a fair amount of my travel is with someone else driving, I began to take projects along with me. Most of our sewing is hand work anyway. Why not knock it out when you are sitting down in a fixed environment for a while?

I made a set of gorgeous beaded sleeves on the 4 round trips to Baltimore when we were buying our boat. That would have been about 30 tedious hours if squeezed in "at home;" but, captive in the car, it helped time to fly by. (Still need to dance in those darned things.)

I almost completely made two little ruffled arm drapes on the way to and from a workshop. (Had to make the pattern and cut them out ahead of time, and do some of the finishing at home on the machine.)

And, yesterday, I worked out the pattern for appliques on a bra and got them sewed on in the 5 hours it took to go and visit family.

The hardest parts of this are 1) breaking down your projects into tasks that can be done in a car (while someone else is driving!) and that also fit the time you will spend in the car; and, 2) knocking out the pre-work and carefully packing so that you have what you need. You will get better at this with practice, as I have. Next thing you know, you will look forward to road trips and waiting rooms as time to sew.

Saturday, December 25, 2010

Resolve to repurpose – Christmas day edition!

A friend of mine says that when she was growing up, her Japanese Mother would always make them clean the house the week between Christmas and New Years. Her thought was that whatever way you start the New Year was the way the rest of your year would go, so a clean and orderly house was in order.

Thinking about this and about New Year’s resolutions we all struggle to keep (as I start up my own end of year cleaning cycle), I wanted to share some ways you can reuse everyday household items to support your dance habits. As I started writing this, I started looking at everything differently; and, I hope you will, too! These resolutions will be EASY to keep, and may save you some money. Let’s see how many we can rack up, starting with the leftover items from today’s gifts.

  1. Save the RIBBONS from Christmas presents and use them as straps (or a strap base) on a costume bra.
  2. . . . or, as side bands for a bra.
  3. . . . or to sew sequins, beads, rhinestones, or other embellishments onto when covering a bra.
  4. . . . or, sew them along the upper band of your hip scarves to stabilize them.
  5. . . . or, sew them along the upper edge dance belts to ease pinning. To do this, hold the ribbon about 1” down from the upper edge of the belt. When sewing, sew along the center line of the ribbon, allowing you to pin above or below as needed.
  6. . . . or, if they complement a belt that is a little too small, use them to cover filler material that expands the belt diameter.
  7. . . . or, use them for wrist bands.
  8. . . . or, for arm bands.
  9. . . . or, for flutters that dangle off of arm bands.
  10. . . . or, for a head band.
  11. . . . or, for ankle bands.
  12. Save the TISSUE PAPER from today’s packages to wrap your coins scarves in; the tissue will keep them shiny.
  13. . . . or, cut the tissue into small squares to use as blotting papers for glistening brows after a show.
  14. . . . or, use it to cushion more delicate props, like glass candle holders.
  15. Save the BOXES from today’s gifts to stow your bedlah.
  16. . . . or, for storing your beaded dresses so they do not stretch.
  17. . . . or, for storing your beaded skirts so they do not stretch.
  18. . . . or, for storing your hipscarves.
  19. And, since silica gel IS your new best friend, you know you want to save those guys to store with your costumes, right?
  20. But, did you know that you could also keep silica gel to store with your FABRIC to keep it in good shape, long before it becomes a costume?

Saturday, December 18, 2010

This applies to costumes, too!

A recent blog post on CNN discussed whether someone could "catch" diseases from vintage clothing. Having worked in a thrift store during college, I can attest that the most delightful items can come from questionable sources. And, environments like thrift stores pile all of the merchandise together, allowing "icky things" to spread. While the likelihood of getting sick from a costume is low, there is a slightly higher chance that you will inherit silverfish or other little critters that like to dine on fabric (as opposed to dining on you).

You may be wondering how this relates to costumes . . .

Ever bought a used one at a workshop?

Ever bought one from a vendor?

Ever bought one, period? Or, bought the parts?

The sad truth is that textiles that become costumes tend to travel a LOT. They may come from halfway around the world. They may live in someone's basement for a few years. And, they may come with "friends."

So, the advice in Dr. Gupta's blog is sound: wash it if you can, isolate the item in a plastic bag for a few weeks, and take good care of your clothes. Periodically inspect all of your costumes and the containers you store them in, looking for little visitors. Keep them in a clean, conditioned environment. And, when introducing new costumes in to the mix, quarantine them for a bit!

Sunday, September 26, 2010

Took an AMAZING costuming workshop!

Folks, I just took the most wonderful costuming workshop yesterday with the lovely Christina from Black Lotus Clothing! I have to just gush -- she was informative, encouraging, clear, and so sweet! I had only seen her creations online, but you have to see them in person to truly appreciate her art. While I am admittedly not that Tribal, and not that Tribal Fusion, I found a lot of her design concepts are appropriate to all costuming needs. And, considering how much I LOVED the movie "Pretty in Pink" as a teenager, I really loved her work and her thinking.

She provided tips that universally apply: how to get inspiration, how to get to costuming quickly, how to repurpose and upcycle (my favorite), AND how to see beyond the surface when contemplating a garment at a thrift store in order to bring out the gold from the scrap hill (or, cover up the scrap hill with gold). She has only recently started teaching this workshop; but, I can assure you she is a natural teacher. She provided so much material in two hours that I need to go back and study my copious notes. I will never look at clearance rack or thrift store aisle the same way again -- and, I will NOT be afraid to rip rather than cut, to throw everything in a pile and see what works, to stand in front of a mirror and fit a garment that is hanging on me! She is fast and loose, full of infectious creative energy, and definitely someone that can inspire! If she is in your area (or, if you are close to her), you OWE it to yourself to study with her!

Saturday, November 21, 2009

Choli conversion

A while back, I put up a post on how to convert a camisole to a bra and sash set. You can use similar principles to make a top (tunic, blouse, or other shirt) into a choli.

Method 1:
If you can't sew and are desperate, take a short T-shirt that fits snugly and carefully tuck it up under your bra. Use another method if it looks lumpy or you will be dancing close to your audience (like a restaurant). Have a friend pin it in place.

Method 2 (minimal sewing):
1. Obtain a top that you like the look of, such as a black velvet (for a basic choli) or one in a color or pattern you like.
2. Put the top on, raise your arms high over your heed, have a friend mark 1" BELOW where the shirt hits your bra band under each arm.
3. Take the top off and lay it flat on a table or other surface you can mark or cut on.
4. Mark a straight line between the marks on each side.
5. Cut along the line CAREFULLY.
6. Try on the top to see where the new bottom hem falls.
7. Baste on pretty trim or ribbon - Heavier trim will help keep the hem "down" when you dance – this and some fringe can keep your performance “G” rated!

Method 3 (more sewing skill required):
1. Obtain a top that you like the look of, such as a black velvet (for a basic choli) or one in a color or pattern you like.
2. If you want to add any gathers to enhance the bustline, do it now (before proceeding to the steps below).
3. Put the top on, raise your arms high over your heed, have a friend mark 2.5" BELOW where the shirt hits your bra band under each arm.
4. Take the top off and lay it flat on a table or other surface you can mark or cut on.
5. Mark a straight line between the marks on each side.
6. Cut along the line CAREFULLY.
7. Try on the top to see where the new bottom hem falls. If it looks like you have enough fabric to add an elastic band, continue with the steps below; if not, go up to method #2, step 7.
8. Use a 3/4 inch to 1” band of elastic to make a bottom band, folding the fabric over to cover the band and sewing into place.
9. Wear with pride!

Any fabric that you cut off from the bottom of the “donor top” can still be used to make a sash or a belt.

Here are two versions; the black one on top uses method 2 (also adding trim to neck and cropped sleeves), while the bottom multicolored choli uses method 3.

Saturday, April 25, 2009

Quick tummy cover ideas

I put these in a post on orientaldancer and wanted to share them here, too.

If you want to cover your tummy, here are some ideas.
1. Wear a leotard, alone or under a top.
2. Buy panty hose that are at least 2 sizes too big, that are NOT control top, and that have as few seams as possible. Pull them up all the way to your bra and pin them thoroughly (use about 8 pins or more). Wear a top over the bra and improvised bodystocking. You can cut off the legs if you want. (Flourish of the veil to Scheherzade for that one!)
3. Wear a long fitted shirt.
4. Wear a tank top -- but, I recommend pinning it to your underwear so that it does not ride up as you dance. Again, use about 6-8 pins.
5. Wear a shirt that can be folded / tied up. Then embellish with a "tummy drape": a pretty necklace, crocheted scarf, or other pretty, dangly thing hung beneath your bra line

And whatever you do, SMILE! It will draw their eyes up.

Saturday, March 14, 2009

North American Find Forecast: March 2009

The Christmas, Mardi Gras, and Valentine’s day holiday inventories are fading; while St. Patrick’s day, Easter and Prom season are on the rise. Spring is dawning here in the US, and here is your “forecast” for what you may find and convert to belly dance use in a store near you.


Red items: carry over from Valentine’s Day, and some Christmas. Price and availability are trending down. Look for: fabrics, jewelry, heart items that may embellish (think: appliqués, sequins, things that can be cut up and sewn on). Location: a clearance rack near you.

Emerald Greens: Some Christmas residuals may be out there, some Mardi Gras, but St. Patrick’s items are more likely. Prices will plummet, along with availability after March 17th. Look for: fabrics, some jewelry, embellishments will mostly be of bead variety. (No one really got into Mardi Gras around here this year due to the recession, so there may be beads aplenty.) Also, may find Purples and Golds. Location: a clearance rack near you.

Pastels: Easter and Prom are converging. Availability will rise over the next few weeks; prices will not drop until mid April. Look for: fabrics (satin, chiffon, silks), complimentary jewelry, and some convertible scarves (related posts coming soon). Embellishments may be in the form of appliqués, sequins, and brooches. Keep an eye out for shoes and sandals (again, related posts coming soon). Location: front of the store, where the “in season” items are kept.

Thrift store report: Some post-holiday and winter clearance on Red, Greens, and velvets. Remember, most thrift stores discount after 4 to 6 weeks in inventory, so seasonal finds are not as common as discounts based on time-in-inventory. Trending high on pre-Prom and pre-Easter (both price and availability). Also, continue to look for belly dance friendly items from years past: bohemian skirts, shirts with Beledi sleeves, embellished tanks -- these items will continue to surface over time; but, availability will always be “target of opportunity” due to the dependence on donations.

*This post title was edited on 3/18/09, as it really applies to North American seasons. Some holidays may be celebrated internationally, so you may be able follow those leads if you are one of my international readers. Feel free to comment if you have thoughts on this matter.

Wednesday, March 4, 2009

Street Skirts Hit the Stage

Isn’t it interesting how everything is more expensive when it’s “for bellydance?” By that, I mean that a simple tiered skirt hangs forlorn on a department store rack at some big-box discount store with a price tag less than $20US, while its not so distant cousin sits packed in a vendor’s truck, waiting to be displayed at an upcoming workshop with a price tag that is 3 to 5 times higher . . .


Folks, skirts are skirts. There are some that are elaborate enough to warrant vendor prices; and, you will not find those out in the wild. But, if you know what to look for, and where to look, you can buy performance worthy gems at clearance rack (“I never met a clearance rack I didn’t like!”) prices. Here is how.

Buy it to fit how you will wear it. That is, street skirts tend to be worn on the waist, and rarely fall below mid-calf; performance skirts need to fall on the hip and extend to the ankle. When buying, try them on so that the “waist” falls at your hip – look to see if the hem falls deep enough to cover the ankle and watch for “hip bumps” in the side seams. (Some skirts are shaped to curve around your hips – that doesn’t quite work when you slide them down to “below the belt.”)

Think of the possibilities. A plain black velvet skirt with a swirl panel (some call it a petal panel) shape may only look ho-hum; stick on some sequin trim along the seams and you have a bit of pizzazz! (FYI, slide the skirt over a piece of cardboard – I used my folded up cutting board. It will keep you from accidentally sewing the front to the back.)


When you get it home, try it on – with your costumes! I literally have “dress up parties” with my young daughter where we see which of Mommy’s pieces work with her new finds. And, when you buy skirts retail (vs. from dance vendors), you can often leverage a return policy.


Buy what you will ACTUALLY wear. I have a pink cotton full skirt with cute little shisha mirrors sewn on that seemed like a great idea at the time. I only wore it to class twice. I’m just not that tribal, I guess.

Friday, February 27, 2009

Harem Pant conversion

There are some things I am willing to splurge on: a well beaded bra and belt, a good silk veil, a beledi dress that is a “one-step costume.” But, harem pants do not fall on that list. Here is how I made a pair for about $6US and some tips so you can, too.

When shopping, start at a thrift store or clearance rack. (“I never met a clearance rack I did not like!”) Then:

1) Look for the for a pair of loose fitting, elastic waist pants in a material that breathes and a color that is USEFUL to your wardrobe. Washable fabrics are even better. I was very lucky and found this pair of black rayon “beach pants” for $4.99US at the local Good---- store.

2) Bring or borrow a rubber band or pony tail tie. You will need it to try the pants on.
3) Check to see that the pants are at least 5 inches longer than you need. I am lucky, because I am short; so, this happens more often than not.
4) Also, be sure that the pants have a full leg to the ankle.
5) When you try the pants on, slip the rubber band / pony tail tie over your foot and use it to gather up the pants leg. This will let you see how the pants will look if you modify them. If you like the look, buy the pants; if not, keep looking.
6) There are two methods of converting these to harem pants:
a. NO SEW: When you need to wear them, slip the rubber band / pony tail tie over your foot and use it to gather up the pants leg. Betcha didn’t think it would be that easy, huh?
b. Some sewing: 1) cut a piece of elastic that is about .5 to 1 inch bigger than the circumference of your ankle. This allows room for overlap and keeps the cuff from being too tight. 2) stitch the ends of the elastic together. 3) turn the pants inside out. 4) slip the elastic band over the cuff of the pants. 5) fold the cuff of the pants over the band and stitch into place.
7) Save the money you spend for something more valuable to YOU!

Camisole conversion

If is one law about costuming, it would probably say, “You can spend money, or you can spend time.” Here is a sewing project for those of you with more of the latter.

Moderate sewing skills needed.
Estimated project time, 4 hours.
Estimated total cost: $20US

Start with one off-the-rack camisole. I found this one on a clearance rack (“I never met a clearance rack I didn’t like!”) for about $7US. This one featured an underbust seam and gathered cups, making bra conversion easy.

What it looked like when I started:


Steps for bra:
1) Carefully cut the camisole to follow a line one inch below the cups, so that you have enough fabric to fold up and under the bra line.
a. Note 1: It is better to cut further down (reducing the remaining fabric that can become your scarf or belt) than to skip on the bra. Trust me on this one.
b. Note 2: if your cami has two layers (mine was thin silk and slippery satin), it is a VERY good idea to pin or tack-stitch the layers together just below the line you will cut. This will keep them aligned when you make your skirt. Again, trust me on this one.
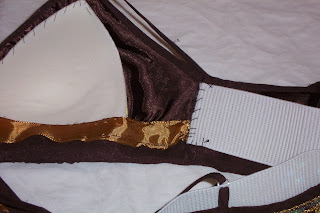
2) Since this cami was silk, I sewed some grosgrain ribbon along the raw edge of the fabric. (By the way, this is one way to recover if you cut too high in step one.)
3) Sew bra cups into the top if desired.
4) Fold the bottom edge of fabric up and under. Sew into place.

5) I wanted this bra top to fit tightly, so I added elastic along the back from side seam to side seam.

6) I then covered the elastic in craft felt. Any soft, non-fraying fabric that is sweat friendly will do.

7) Embellish as desired. Here, I made some tassels accented with sequins, I made some bows out of trim, and I covered the straps with the same trim.**

Steps for scarf / skirt:*
1) If you cami had two layers of fabric, align and pin or tack-stitch them together.
2) If desired, sew some grosgrain ribbon along the raw edge of the fabric.
3) Fold the top edge of the fabric over and under to make a hip band. Sew into place, adding elastic if you wish.

4) Embellish as desired.

Here is the finished product:


* You can also cover a belt if you have enough fabric and patience. I did not.
** There are those of you who will roll your eyes and say “Christmas trim, not AGAIN!” Please understand that this is not intended to be a “professional costume.” This is intended to be a costume for haflas or informal performances, made by those who are new to performing and who do have more time than money to spend on costumes.